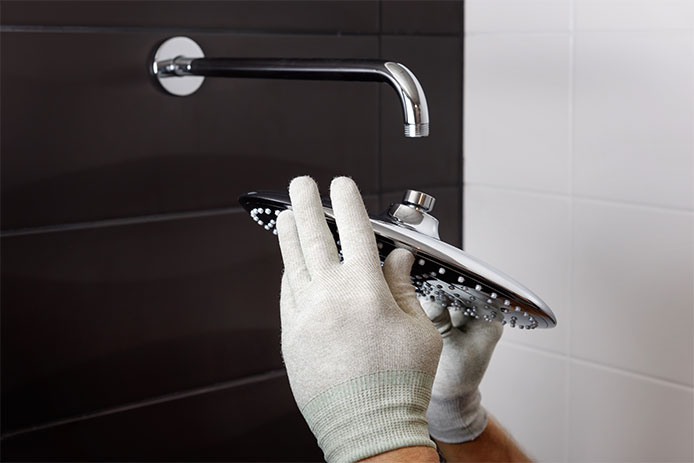
Replacing your showerhead is a minor bathroom upgrade but one that packs a powerful punch. This easy and inexpensive DIY project shouldn't take you more than an hour, and it can do wonders to give your bathroom a fresh and upgraded look. Also, old showerheads tend to leak more and can be less water-efficient, meaning they are more costly to use. Replacing an old showerhead won't just give your bathroom a new look, but it can also save water and money in the long run.
There are many different styles and designs of showerheads to choose from, so you shouldn't have any problems finding one that matches your bathroom's aesthetic. Spend anywhere from $50 to $200 to find the showerhead of your dreams and install it easily yourself. While federal regulations restrict water flow to under 2.5 gallons per minute to save water, you can still select from regular or high-pressure flow heads with a variety of popular brands such as Kohler, Grohe, Delta, and American Standard. While different kinds of showerheads may require slightly different replacement methods, here is a general guide on how you can swap out your showerhead for a new one to give your bathroom the fresh look it needs.
Before You Begin

Before you begin, you'll want to be sure you have everything you need, including your new showerhead. Choosing a showerhead is both a personal and functional decision, so be sure to choose the right showerhead for your space and aesthetic. In addition to a showerhead, you will also need some plumber's tape, or thread-sealing tape, to get the job done well. Also, make sure you have a wrench or soft jaw pliers on hand, as well as cloth and a wire brush, a stool if needed, and something to cut the tape with.
Unscrew Existing Showerhead

This may seem an obvious step, but make sure you turn off the faucet before trying to remove the old showerhead. If you remove the existing showerhead with the faucet turned on, water will likely shoot everywhere, and you'll have a wet mess on your hands. Instead, turn the faucet off. Turning off the water in the house is probably not necessary, although you can if you prefer.
Once the faucet is shut off, it's time to unscrew the existing showerhead. If your showerhead is particularly old, it could be corroded and difficult to remove by hand. Use a wrench instead to get it off. Turn the neck of the showerhead counterclockwise to remove it without also turning the pipe in the wall.
Remove Excess Dirt

Chances are you're going to encounter some dirt. Use a cloth or scrubber to clean off any rust, dirt, mineral deposits, old tape, old sealant, and grime on the shower arm threads. This is an important step for getting the best results from your new showerhead. If you need a deeper clean, use a wire brush or old toothbrush to really get into the exposed pipe. Be sure that the threaded end of the extension pipe coming through the wall is clean before the next step.
Use Thread-sealing Tape

Wrap thread-sealing tape around the threads of the exposed pipe. Each layer of sealing tape should cover half of the previous layer as you wrap up the threads. Start at the base of the threaded part of the pipe and wrap clockwise until you reach the end of the threads. Wrapping the tape counterclockwise will cause it to possibly unravel when you screw on the new showerhead. When you're finished, use your fingers to press the tape deep into the pipe threads to smooth it out.
Attach Replacement Showerhead

Once your threaded pipe is cleaned and threaded, it's time to attach the new showerhead. As with anything, be sure to read the manufacturer's instructions before beginning so that you know exactly how to effectively attach and use the product. Use your hands to screw the showerhead clockwise onto the threads until it is secure. Hand-tighten it a quarter turn so that the showerhead feels snug. If you don't feel comfortable using your hands, feel free to use a wrench to get it screwed on tightly. Don't screw it too hard to avoid breaking the plastic connecting nut.
Check Fit, Look for Leaks, Make Adjustments

We're almost done! Be sure to check the fit, look for leaks, and make any adjustments you may need. Point the showerhead away from you and turn on both the hot and cold water. If you see a leak, your showerhead may need a little more tightening. Alternatively, you may need to add some more tape to the threads or adjust them to be sure they are secure. Check the rubber seal to make sure that it is lining up properly to check for any damage. If you still have a leak or low pressure, remove it and start again. Also, be sure to check all the components so that you can identify what's causing the problem and fix it accordingly.
Just like that, with a few simple supplies and a few minutes of your time, you've got a brand-new showerhead to upgrade the look and function of your bathroom.
While do-it-yourself projects can be fun and fulfilling, there is always a potential for personal injury or property damage. We strongly suggest that any project beyond your abilities be left to licensed professionals such as electricians, plumbers, and carpenters. Any action you take upon the information on this website is strictly at your own risk, and we assume no responsibility or liability for the contents of this article.


